
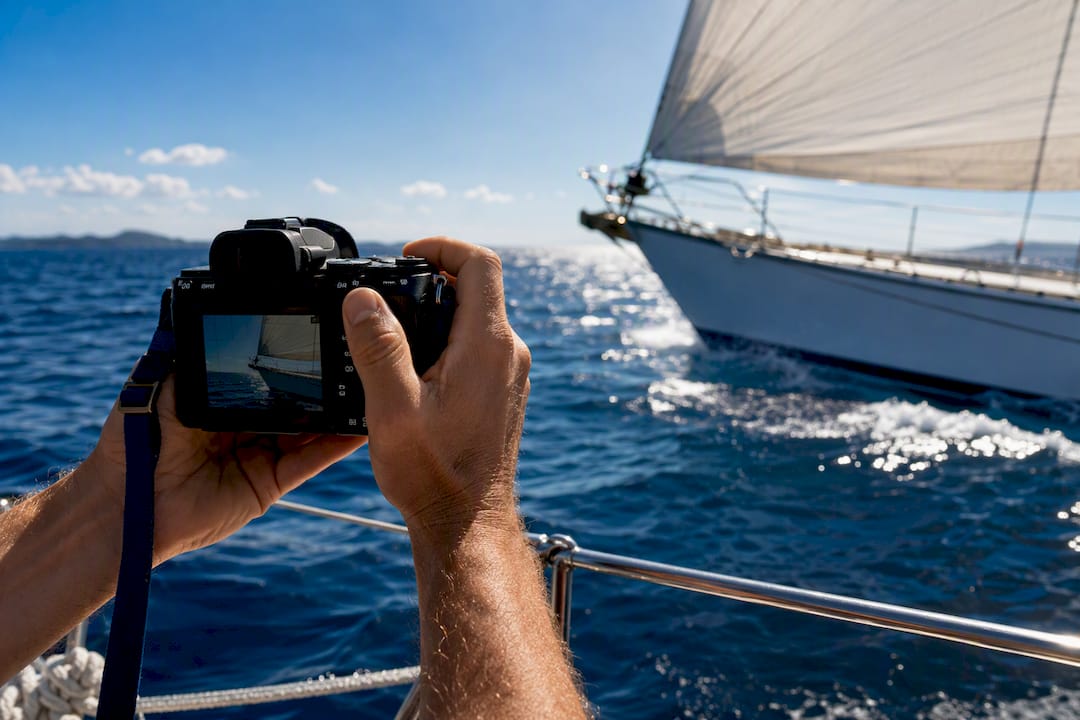
Shoot with a fast shutter, brace your body, and capture in RAW: those three habits fix most of what goes wrong with photography on a boat. Before you step aboard, get your strap on, your dry bag zipped, your burst mode ready, and your polarizer within reach. Everything else, from lens choice to horizon leveling, builds on that foundation.
TL;DR:
- Using a shutter speed of at least 1/500s is essential for sharp images, with 1/1000s or faster necessary for wildlife and fast-moving subjects.
- A midrange zoom lens (24-105mm) offers the best versatility for general scenes, while telephoto lenses are better for distant wildlife but more challenging on a moving boat.
- Prioritizing technique such as proper bracing, timing, and burst shooting significantly improves keeper rates over expensive gear.
- Packing minimal, high-impact gear like a monopod, polarizer, dry bag, and extra batteries is more effective than carrying a full kit onboard.
- Post-shoot cleaning and protection against saltwater damage are crucial to maintain gear longevity after waterborne photography.
Table of Contents
- Your Pre-Shoot Checklist for Boat Photography
- Which Gear Actually Helps on a Boat Shoot?
- What Camera Settings Work Best for Moving Boats?
- How Do You Keep the Camera Steady on a Rocking Boat?
- Where Should You Stand for the Best Boat Photos?
- Camera Techniques for Wildlife, Seascapes, and Action Shots
- Protecting Your Gear After a Saltwater Shoot
- A Skipper’s View From Halkidiki’s Waters
- Why Most Boat Photography Advice Gets the Priorities Backward
- Sources
- FAQ
Your Pre-Shoot Checklist for Boat Photography
Get this right on the dock, and the water will forgive almost everything else. Set your camera before you leave solid ground, because fumbling with menus on a rocking deck costs you the shot and risks your gear going overboard.
Start with these defaults, then adjust once you feel the boat’s rhythm:
- Shutter speed: 1/500s minimum for general shooting, 1/1000s or faster for wildlife or fast-moving subjects.
- Aperture: f/5.6 to f/8 for sharpness across the frame; open wider only when light forces you to.
- ISO: Use Auto ISO with a capped ceiling appropriate for your camera, so the camera prioritizes shutter speed over noise.
- Drive mode: Continuous high-speed burst, always. A moving boat means your framing shifts between frames whether you want it to or not.
- Autofocus: AF-C (continuous) with a wide or zone tracking area, not single-point.
- File format: RAW, non-negotiable. Boat photography guides consistently recommend RAW capture because it recovers highlight and shadow detail that JPEG throws away.
On the gear side, pack a wrist strap or harness so a sudden wave never turns your lens into a $2,000 anchor. Bring a dry bag rated for splash exposure, a rain cover if you are shooting near the bow, a microfiber cloth, and at least one spare battery and memory card. Boats do not have camera stores.
Before the engine starts, or in the case of a sailing trip, before the sails go up, talk to your skipper. Tell them roughly when you plan to shoot and ask where you can stand without getting in the way of lines, cleats, or crew movement. Secure anything loose in your bag; a rogue lens cap rolling across the deck is a distraction nobody needs mid-maneuver.
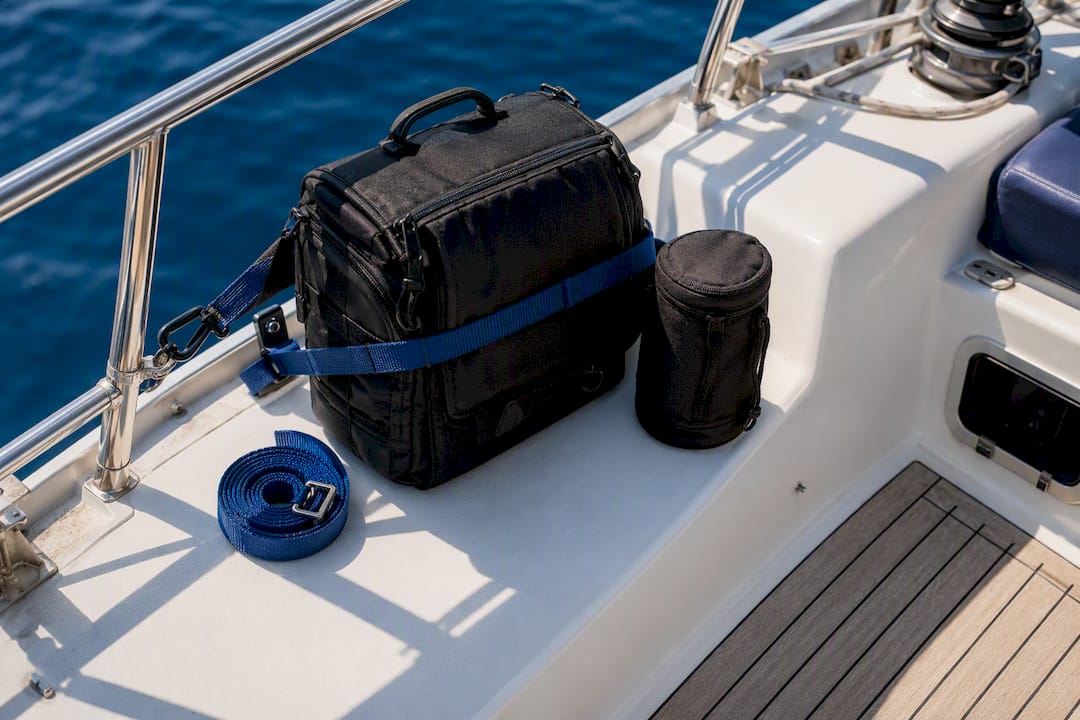
Pro Tip: Keep one hand on the rail or a fixed point at all times when you are shooting, even in calm water. Wakes from other boats can hit without warning, and a camera is never worth a fall.
Which Gear Actually Helps on a Boat Shoot?
You do not need the newest sensor to get sharp images on water, but you do need a body that handles ISO 3200 and up without falling apart. If you are choosing between two camera bodies for a boat trip, prioritize high-ISO performance over resolution. A clean image at ISO 6400 beats a noisy one at ISO 1600 with a slower shutter, because motion blur from boat vibration ruins far more shots than grain does.
Lens choices: reach versus stability
A telephoto lens (200mm and beyond) gets you close to wildlife, distant headlands, or another sailboat on the horizon, but it also magnifies every twitch of the boat. A midrange zoom, something in the 24 to 105mm range, is more forgiving and versatile for general scenes, groups on deck, and close-quarters shots. Wide-angle lenses (under 24mm) work best for capturing the boat itself, the horizon, and dramatic sky, and they are the most tolerant of camera shake since any movement is less visible at wide focal lengths.

If you can only bring one lens, a midrange zoom covers the widest range of situations. If you are chasing seabirds or distant coastline detail specifically, a telephoto earns its weight, but expect a lower keeper rate.
The accessories that matter most
- Monopod: A monopod stabilizes long lenses far better than a tripod on a moving deck, since a tripod’s wide stance actually fights the boat’s motion instead of absorbing it.
- Floating camera strap: Cheap insurance against a $1,500 mistake if a clip fails or your grip slips.
- Polarizing filter: Cuts glare off the water’s surface and deepens sky and sea color, though it reduces the light reaching the sensor by some stops.
- ND filter (6 to 10 stop): Lets you smooth water into that silky look during long exposures, useful at anchor or in very calm conditions.
- Rain cover and dry bag: Non-negotiable near spray zones or when weather turns.
Pack light rather than bringing your entire bag. Two lenses, one filter set, and a backup battery beat a full kit that you cannot manage with one hand while holding the rail with the other. If you are shooting a full-day charter, a second body (even a compact one) as backup is worth the extra weight, because swapping lenses on a rocking deck invites dropped gear and salt spray on your sensor.
What Camera Settings Work Best for Moving Boats?
Camera settings on a boat come down to one priority: shutter speed beats everything else, most of the time. A sharp, slightly grainy photo is usable. A blurry, clean photo is not.
- Wildlife and birds in flight: Use shutter speeds of around 1/1000s or faster. Fast shutter speeds paired with burst mode are the standard recommendation for photographing moving subjects from moving boats.
- Action shots (other boats, watersports, crew activity): 1/500s minimum, faster if the subject is close or moving quickly across your frame.
- Wide seascapes and static scenery: 1/125 to 1/250s is often enough if your lens has image stabilization and you brace well, since the wider field of view hides small amounts of shake.
- Long exposures (smooth water effects): Only attempt these at anchor, in a sheltered cove, or during very calm conditions, using an ND filter to extend exposure time safely.
Aperture choice follows a simpler logic. For most boat shooting, stay between f/5.6 and f/8, which keeps enough depth of field to forgive small focus errors caused by the boat rocking while still letting in enough light. Only open up to f/2.8 or f/4 in low light when you have no other option, and only stop down past f/11 when you specifically want extreme depth of field and can accept a slower shutter as the tradeoff.
ISO is where most amateur photographers hesitate too much. Modern sensors handle ISO 3200 and even 6400 far better than photographers expect, and a noisy but sharp frame is always more usable than a smooth but blurry one. Set Auto ISO with a ceiling around 6400, and let the camera raise sensitivity before it drops shutter speed below your safety threshold.
On keeper rates: shooting the same composition multiple times in a burst, rather than firing once and moving on, is one of the most repeated pieces of advice from photographers who specialize in boat work. Repeating a composition across several frames accounts for shifting perspective as the boat moves, and it is the single easiest way to raise your usable-shot percentage without buying new gear.
For drive and focus mode, set continuous high-speed burst and AF-C with wide-area tracking. If your camera supports back-button focus, use it. Separating focus from the shutter button lets you pre-focus on a fixed point, like the horizon or an approaching bow wave, and fire the shutter the instant your subject arrives without the camera hunting to refocus.
Long exposure work on boats is a specialty case, not a default. If you want smooth, silky water, you need an ND filter strong enough to slow your shutter to a half second or longer, and you need the boat stationary or nearly so. Timing this during golden hour or blue hour reduces the ND strength you need, since ambient light is already lower and you are not fighting full daylight to get a slow enough shutter speed.
How Do You Keep the Camera Steady on a Rocking Boat?
Your body is your tripod on a boat, and how you use it matters more than any piece of gear you bring. Stand with your feet shoulder-width apart, knees slightly bent, and let your legs absorb the boat’s motion the way a shock absorber does. Tuck your elbows into your body rather than letting them float, and use the mast, a rail, or a cabin wall as a fixed brace point whenever one is within reach.
Time your shutter release with your breathing and, more importantly, with the boat’s motion. Boats roll rhythmically in most conditions, so fire at the top or bottom of the roll, the brief pause point, rather than mid-swing when movement is fastest.
- Plant your feet in a staggered stance, one slightly forward, to absorb roll and pitch independently.
- Keep your camera strap around your neck even when using a monopod, as a backup against a dropped connection.
- Avoid standing fully upright with locked knees; a soft, athletic stance handles sudden movement far better.
- Never lean over the rail for a shot without a second point of contact, whether that is a hand on a line or a crew member holding your belt.
Monopod technique that actually works
A monopod outperforms a tripod on a moving deck because a tripod’s three fixed legs fight the boat’s motion instead of moving with it. Angling the monopod’s foot slightly away from the hull rather than planting it perfectly vertical reduces slipping on wet or angled decking. Brace the monopod against your thigh or hip for an extra point of stability, and keep your stance staggered so a sudden lurch does not send both you and the pod sliding in the same direction.
Store your monopod in a strap-secured position when not shooting rather than leaning it against a rail, where a wave or a sudden turn can send it sliding across the deck or into the water.
Pro Tip: If you feel yourself fighting the boat’s motion to keep the frame level, stop trying. Loosen your stance, let your hips absorb the roll, and time your shutter for the brief moment of stillness at the top of each wave cycle instead of fighting it constantly.
When you have to choose between raising shutter speed and relying on in-body or lens stabilization, choose shutter speed first. Image stabilization compensates for small hand tremors, not the larger, unpredictable movement of a boat deck. A faster shutter beats stabilization every time conditions get choppy.
Where Should You Stand for the Best Boat Photos?
Your position on the boat changes your entire photo before you even lift the camera. Each vantage point comes with real tradeoffs.
Shooting from the bow gives you the cleanest foreground and the best angle for capturing the boat cutting through water, plus strong reflection opportunities in calm conditions, but it is also the roughest ride and the wettest spot in any swell. The side of the boat, near midship, offers the most stable footing and a good angle for portraits of people on deck or scenery passing alongside, though you lose the dynamic foreground a bow shot gives you. Shooting from the stern works well for wake shots, following boats, or capturing a receding coastline, and it tends to be one of the calmer spots on a sailing vessel since it sits closer to the boat’s pivot point.
Horizon control deserves real attention, because a tilted horizon reads as amateur work faster than almost any other flaw. Use your camera’s built-in electronic level if it has one, glance at it before every shot in rough conditions, and if you cannot get it perfect in camera, plan on a quick straighten in post-processing rather than fighting for a perfect frame while the deck moves under you.
- Use the boat’s wake as a natural leading line pulling the viewer’s eye toward the horizon or a distant subject.
- Ropes, rigging lines, and the edge of the rail all make effective compositional frames when shot from a low angle.
- Shoot low and wide near the bow for dramatic water-level perspectives, but only with a second point of contact secured.
- Include a crew member or fellow passenger in the frame for scale when photographing coastline or open water.
Pro Tip: A wide-angle lens exaggerates the sense of speed and scale when you shoot low near the bow, but never lean past the rail line for that shot. Ask the skipper to slow slightly instead of taking the risk yourself.
Camera Techniques for Wildlife, Seascapes, and Action Shots
Different subjects on the water demand different approaches, and trying to use one technique for everything is where most keeper rates suffer.
-
Wildlife: Anticipate movement rather than reacting to it. Dolphins, seabirds, and other marine life follow patterns, surfacing rhythms, flight paths, feeding behavior, so watch for a few seconds before you start shooting. Keep a respectful distance and let a longer lens do the work rather than asking the skipper to close in, both for the animal’s sake and for your own shot quality, since startled wildlife rarely poses well. Pan smoothly with the subject’s movement rather than snapping the camera to follow, and accept that your keeper rate on wildlife will be lower than on static scenes. That is normal, not a sign you are doing something wrong.
-
Seascapes and sunsets: Bracket your exposures when the dynamic range between sky and water is extreme, typically three frames at zero, minus two, and plus two stops, and blend them later if needed. For most golden hour shooting, a single well-exposed RAW file gives you enough latitude to recover both highlight and shadow detail without the hassle of HDR blending. If you want a long-exposure smoothing effect on the water, this only works reliably at anchor or in sheltered water like a calm cove; you cannot get a clean long exposure on an underway sailing boat.
-
Portraits on deck: A midrange lens (50mm to 85mm equivalent) flatters faces without the distortion of a wide-angle. Use natural fill light from the sky rather than harsh direct sun when possible, and a polarizer can reduce distracting glare bouncing off the water onto your subject’s face, though watch your shutter speed since the filter costs you light.
-
Action and fast movement: Decide upfront whether to you want to freeze motion or show it. Freezing a fast-moving boat or a water-skier requires 1/1000s or faster and a fast burst rate. Showing motion, a wake trailing behind a boat, spray arcing off a bow, calls for a deliberately slower shutter around 1/60 to 1/125s combined with a panning motion that tracks the subject, blurring the background while keeping the subject relatively sharp.
Protecting Your Gear After a Saltwater Shoot
Salt does its damage slowly and quietly, which is exactly why so many photographers underestimate it until a shutter button starts sticking or a zoom ring grinds. Salt mist settles into seams, buttons, and lens threads even when you never got directly splashed, and treating cleanup as routine rather than optional is the difference between gear that lasts years and gear that fails in one season.
The moment you finish shooting, wipe down your camera body and lens with a dry microfiber cloth, focusing on seams, dials, and the lens mount. Remove your battery and memory card if you are storing the camera for any length of time, since moisture trapped against contacts causes more corrosion than moisture on the exterior housing.
- Wipe, never rinse, unless your gear is explicitly rated for submersion; running water can force salt deeper into seals rather than removing it.
- Stow your camera in a sealed dry bag the instant you stop shooting, not at the end of the day.
- Pack silica gel packets in your camera bag to absorb ambient moisture during transport and storage.
- Schedule a professional sensor and body cleaning if you shoot near saltwater spray regularly, roughly once or twice a season depending on frequency.
Pro Tip: Back up your RAW files the same day, labeled by date and location, and keep a simple note of your gear’s serial numbers for insurance purposes. A dropped lens is bad enough without also losing the only copies of the shots you got before it happened.
A Skipper’s View From Halkidiki’s Waters
Local knowledge changes how you shoot. Off The Hook, the sailing boat behind Halkidiki Boat Sailing, operates across Halkidiki’s Sithonia coastline, and George Dimitriadis has spent seasons reading how light and water behave along this specific stretch of coast, from Neos Marmaras to Paliouri.
A sunrise shoot off Neos Marmaras rewards patience more than gear. The light comes up soft and low over the water, and a midrange lens at f/8 with a polarizer cuts the early glare enough to hold real color in the sea without losing the sky. Paliouri at sunset works differently. Shooting portraits with subjects backlit by the falling sun, a wider aperture around f/4 keeps skin tones warm while the polarizer knocks down the worst of the reflected glare bouncing off the water behind them.
One detail worth knowing before you book any boat photography trip: a sailing boat, like Off The Hook, produces far less engine vibration and wake disturbance than a motorized vessel, since it relies on sail power for most of a passage. That matters directly for image sharpness, less mechanical vibration transferring into your hands means a meaningfully higher keeper rate on slower shutter speeds than you would get aboard an engine-driven craft.
Why Most Boat Photography Advice Gets the Priorities Backward
Most guides to shooting from boats lead with gear, the right lens, the right filter, the right camera body. That ordering is backward. The research on keeper rates points to something simpler and less expensive: shutter speed discipline and repetition beat equipment every time. A photographer with a mid-range zoom shooting bursts at 1/1000s will out-produce someone with a premium telephoto who fires single frames at 1/250s and hopes for the best.
The overrated skill is chasing the perfect single frame. The underrated one is treating every composition as a burst of ten attempts, because the boat guarantees your framing will shift between frame one and frame ten regardless of how steady you feel. What readers should prioritize first is not a lens purchase. It’s building the habit of bracing, timing the roll, and firing in bursts until that rhythm feels automatic. Gear upgrades matter eventually. Technique matters immediately, and it costs nothing.
— George
Sources
A few outside references are worth bookmarking alongside this guide. Canon’s own technique page on photographing water goes deeper into ND filter strengths and long-exposure math than a single article can cover. The Audubon Society’s guide to photographing birds from a boat is the most thorough resource available on doing wildlife photography from water without disturbing the animals you are there to shoot. For monopod-specific technique on unstable decks, Tombol Photo’s guide to photographing from boats breaks down bracing methods in more detail than fits here. If you want the original keeper-rate framing that shaped much of this guide’s approach to shutter speed and burst shooting, the source is jvn.photo’s guide to boat and ship photography.
If you are planning an actual shoot rather than just researching gear, consider exploring Mediterranean island shoots inspired by guides like Bucket List Travels on the Island of Spetses, which offer ideas for photographic compositions and travel framing, as well as a sunset private cruise aboard Off The Hook that gives you four hours of golden-hour light over Sithonia’s water, exactly the window this guide keeps pointing back to for the best combination of soft light and manageable ND requirements. For photographers wanting more time and more locations, the weekly private cruise covers multiple coves and vantage points across a full week, which matters if you are chasing specific light conditions that a single afternoon cannot guarantee.
- Getting The Best Results When Photographing From A Boat Or Ship
- How to photograph water
- Photographing birds from a boat: a guide to basics
- Photographing from boats
FAQ
How Do You Take Good Pictures on a Boat?
Set a fast shutter speed (1/500s or faster), brace your body against a fixed point on the boat, and shoot in continuous burst mode to capture multiple frames per composition. Shooting in RAW gives you the latitude to recover detail if your exposure is slightly off in changing light.
What Is the 2/3 Rule in Photography?
The 2/3 rule generally refers to positioning your main subject or horizon along one of the lines roughly two thirds of the way into the frame, rather than dead center, to create a more balanced composition. On a boat, this applies most often to horizon placement, keeping it at the upper or lower third rather than splitting the frame in half.
What Do You Call Ocean or Water-Based Photography?
Water-based photography covering seascapes, marine life, and boats is broadly called maritime or nautical photography, with more specific work like bird and marine wildlife shooting falling under wildlife photography. There is no single formal industry term separate from these broader categories.
What Is the 20-60-20 Rule in Photography?
This rule does not correspond to a standard, widely recognized photography technique or exposure guideline, and definitions of it vary depending on the source. If you have seen it referenced for boat or water photography specifically, treat it as anecdotal rather than an established rule.
What Shutter Speed Should You Use on a Moving Boat?
Use 1/500s as a general minimum, and push to 1/1000s or faster for wildlife, birds, or any fast action. For calm, wide seascapes with a stabilized lens, you can drop to 1/125s to 1/250s, but faster is almost always safer on a moving deck.