
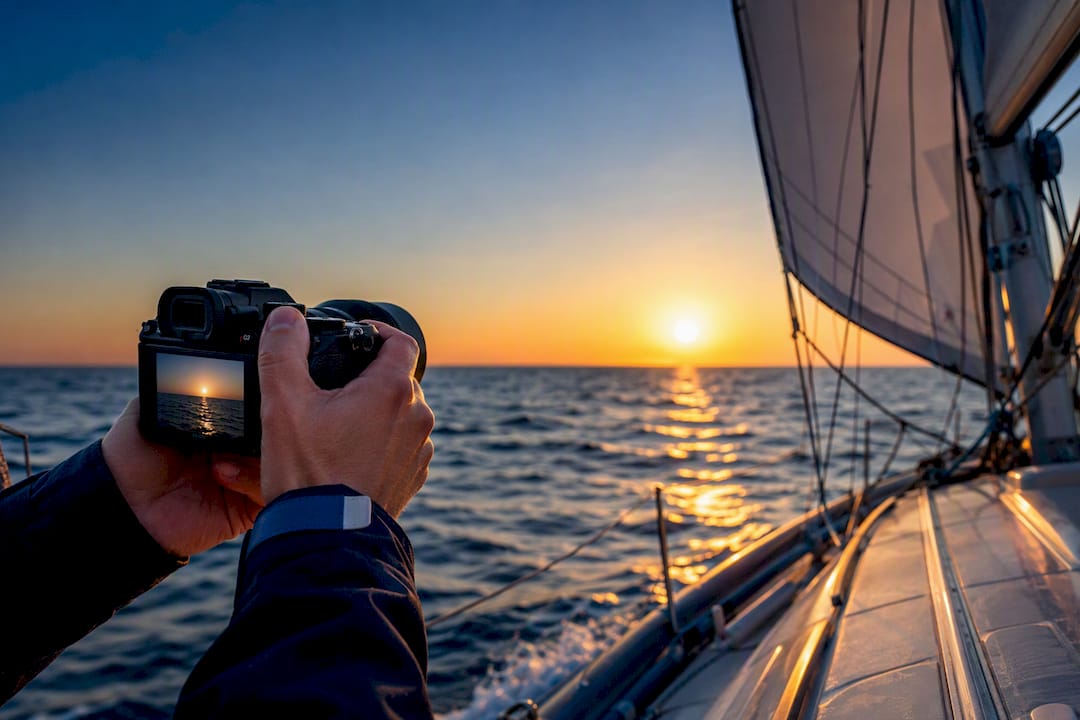
On the water, the shot you miss is almost always about timing and settings, not talent. Set a fast shutter speed, shoot in continuous burst mode, and mount a polarizer before you leave the dock. Protect your gear from spray with a simple dry bag and microfiber cloth routine, then choose your vantage point (onboard for intimacy, chase boat or shore for scale) based on the story you actually want to tell.
TL;DR:
- Using fast shutter speeds of at least 1/500 second, or 1/1000 to 2000 for telephoto, is crucial to freeze motion caused by boat pitching and rolling.
- Shooting in burst mode and reviewing full sequences increases the chance of capturing sharp, dynamic images rather than relying on a single shot.
- Protecting gear with a dry bag, using a polarizer, and cleaning salt film regularly prevent damage and maintain image quality throughout the shoot.
- Vantage points vary from onboard for intimacy, chase boats for control, to shore or aerial for scale, each offering different storytelling advantages.
- Watching the boat’s rhythm and crew movements enhances shot timing more than constantly adjusting camera settings or relying on gear alone.
Table of Contents
- 10-Point Checklist Before You Leave the Dock
- Camera Settings That Actually Work on the Water
- Gear That Survives Salt Spray and Actually Helps
- Choosing Your Vantage: Onboard, Chase Boat, Shore, or Air
- Composition and Light: Getting the Frame Right
- Reading the Moment: Action and Motion Techniques
- Planning the Shoot: Working With Crew and Staying Safe
- Workflow: Shooting RAW and Saving Your Best Frames
- Beyond Golden Hour: Other Windows Worth Shooting
- A Sunset Sail Aboard Off The Hook: What Actually Worked
- Building Your Own Eye Behind the Lens
- Sources
- FAQ
10-Point Checklist Before You Leave the Dock
Good sailing photography advice starts on land, not on the water. Here’s what to lock in during the five minutes before you cast off.
- Set shutter priority or manual mode with a baseline of at least 1/500 second. This gives you a working starting point before conditions change.
- Format your memory cards the night before, not at the dock, so you’re not fumbling with a full card mid-shoot.
- Charge two batteries minimum. Cold spray and constant screen use drain power faster than you’d expect.
- Pack a dry bag rated for the conditions, not just a splash-resistant pouch. A rogue wave off the bow will test it.
- Bring at least two microfiber cloths. One gets salty within the first hour; you’ll want a clean backup.
- Choose your primary lens based on your goal. A wide zoom for crew and deck action, a short telephoto for fleet shots from a distance.
- Screw on your polarizer before you leave the dock. Fumbling with filters on a rocking boat wastes good light.
- Check your camera strap or wrist leash. A loose neck strap is how cameras end up on the seafloor.
- Confirm your role with the skipper or crew so nobody expects you to handle lines when you’re mid-shot.
- Review basic hand signals with anyone you’ll photograph, so they know when you’re ready without breaking their rhythm.
Running through this list becomes automatic after a few outings, and it’s the difference between arriving prepared and arriving hopeful.
Camera Settings That Actually Work on the Water
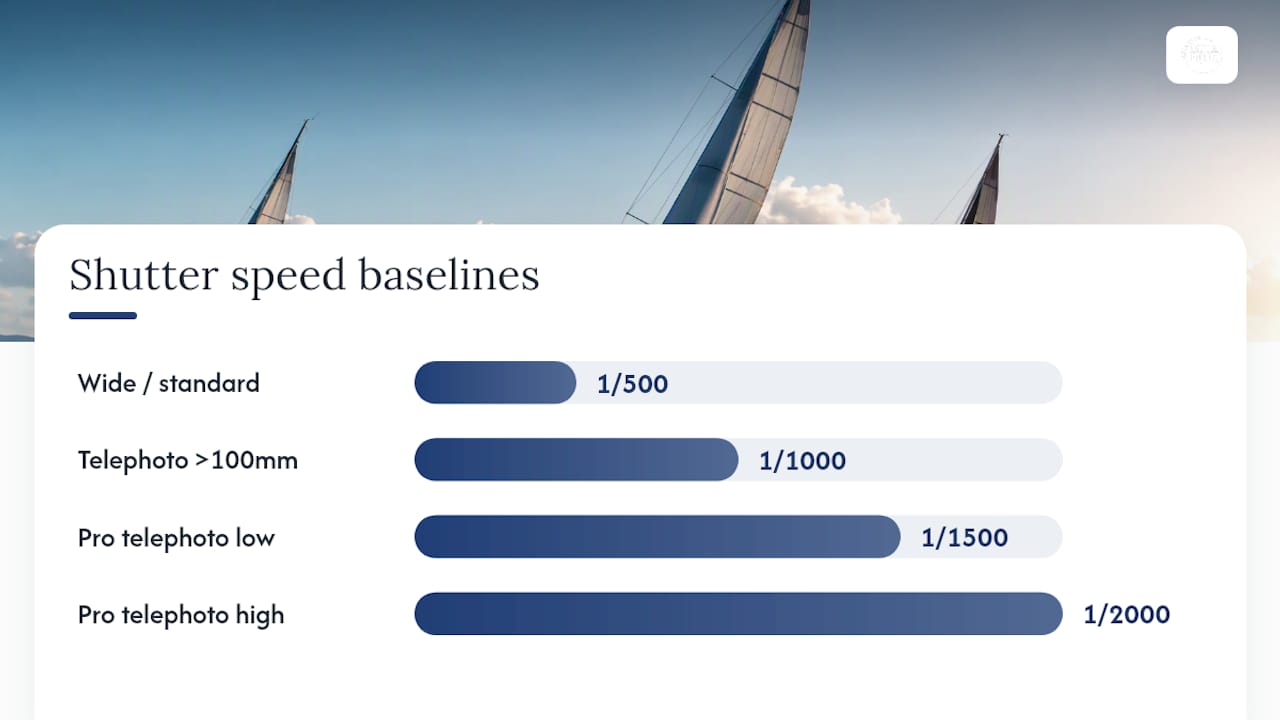
Shutter speed decides more about your keeper rate than any other setting on a boat. A vessel under sail pitches, rolls, and yaws constantly, and even a “still” subject is moving relative to your sensor. As a baseline, shoot at 1/500 second for wide and standard focal lengths, and push to 1/1000 or faster when you’re working with anything above 100mm. Maritime photographer Onne van der Wal, known for his regatta and superyacht work, runs even faster: he recommends very fast shutter speeds for telephoto work, often in the 1/1500 to 1/2000 range, specifically because long lenses amplify every bit of boat movement into visible blur.
Choose aperture based on shooting goals; moderately closed apertures for wide shots and wider apertures for close-up portraits, where a shallow depth of field separates the person from a busy, cluttered background of ropes and hardware.
ISO is where a lot of amateur photographers hesitate unnecessarily. Modern sensors handle ISO 800 to 1600 cleanly enough that noise is rarely the limiting factor in a sailing shot. Underexposure and motion blur ruin far more images than grain does. If bumping ISO to 3200 is what it takes to hold a 1/1000 shutter speed in flat, overcast light, take that trade every time.
Autofocus setup matters as much as your exposure triangle. Set your camera to continuous autofocus mode with a wide focus area to track moving subjects without needing pinpoint accuracy. Back-button focus, where you separate the focus trigger from the shutter button, gives you more control on a pitching deck because you can lock focus and fire multiple frames without the camera hunting to refocus on every press.
Burst mode is not optional on the water. Shooting continuous high-speed bursts around the moment of interest, rather than trying to time a single frame, is how you compensate for a boat’s constant micro-movements. One approach that consistently improves results: anticipate the motion and fire in bursts timed to the lull between wave pulses, when the vessel briefly settles before the next roll.
Evaluating your keeper rate matters more than most people realize. Don’t judge a burst sequence by the first frame you see on the review screen. Scroll through the full sequence, because sharpness often peaks two or three frames after the moment your instinct told you to press the shutter.
- Shutter: 1/500 minimum, 1/1000 to 1/2000 for telephoto or fast action
- Aperture: f/8 to f/11 for scenics, f/2.8 to f/4 for portraits
- ISO: don’t hesitate to push to 1600 or 3200 in flat light
- AF mode: continuous (AF-C), wide focus area, back-button focus if available
- Drive mode: high-speed continuous burst, always
Pro Tip: Set a custom button to toggle between your two most-used AF area sizes. Sailing subjects shift constantly between “whole boat” and “single sailor’s face,” and digging through menus mid-shot costs you the frame.
Gear That Survives Salt Spray and Actually Helps
Lens choice on a boat comes down to three practical ranges. A wide zoom in the 16 to 35mm range covers the boat itself, the crew, and the surrounding scenery in one frame, which is your workhorse for onboard shooting. A standard zoom around 24 to 70mm handles most general-purpose shots without forcing you to swap glass on a rocking deck. A short telephoto, 70 to 200mm, is what separates casual snapshots from genuinely dramatic fleet or chase-boat images, letting you compress distance and isolate a single sailboat against open water.
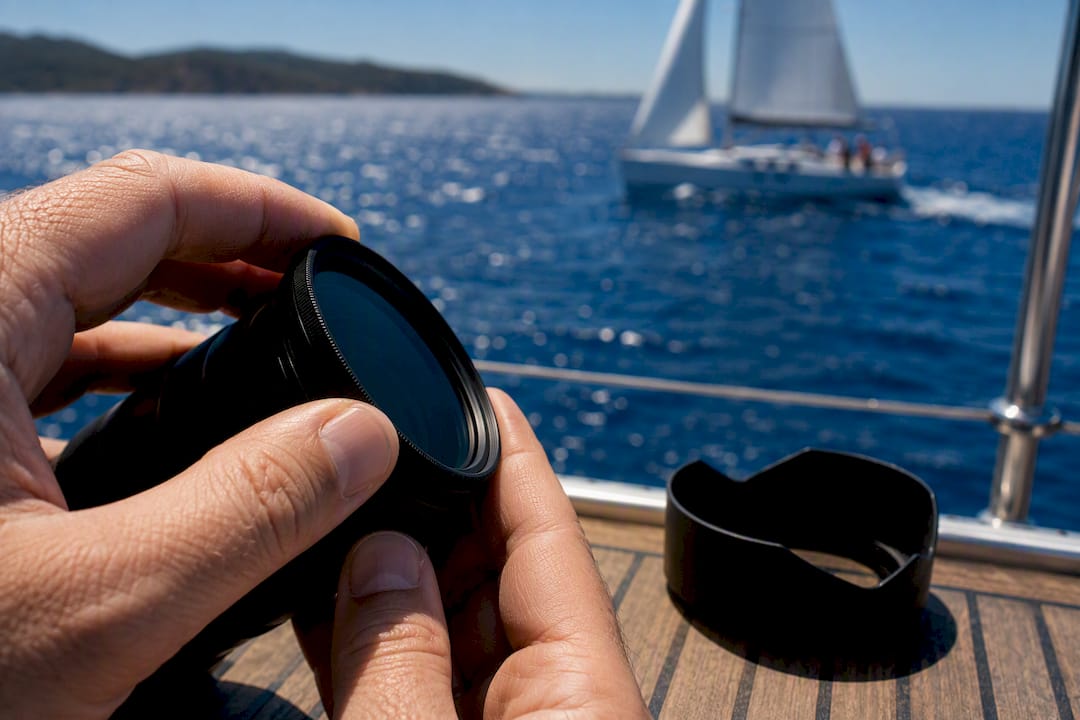
A circular polarizer earns its place in your bag faster than almost any other accessory. Rotating it cuts glare off the water’s surface and deepens both the sky and sail colors, which is exactly the horizon and color correction guidance most maritime photographers rely on. Keep your lens hood attached in bright, reflective conditions. It reduces flare and adds a small buffer of physical protection for the front element against stray spray.
Strap setup is a bigger deal on a boat than on land. A standard neck strap swings and can slam into railings or gear during a tack. A wrist leash or a cross-body strap that sits close to your body reduces that swing and lowers the risk of a camera going overboard, a point echoed in general sailing photography safety guidance around stabilization tools.
Housings and dry bags aren’t interchangeable. A dedicated camera housing makes sense if you’re shooting from a low, wet position with regular spray contact. For most day-sailing work, a roll-top dry bag for storage between shots, paired with a rain cover you can throw on quickly, covers the real risk.
- Wide zoom for onboard storytelling and crew shots, standard zoom as your default working lens, and short telephoto for chase-boat and fleet separation
- Circular polarizer, screwed on before departure
- Wrist leash or cross-body strap, never a loose neck strap
- Roll-top dry bag plus a quick-deploy rain cover
End-of-day care prevents most gear failures before they start. Wipe the front element with a barely damp cloth followed immediately by a dry one, a routine Onne van der Wal recommends to clear salt film before it dries and etches the glass. Store gear in a cooler cabin rather than moving it straight from a hot deck into air conditioning, since rapid temperature swings cause internal condensation. For a full packing breakdown built around real charter conditions, the sailing photography gear checklist covers waterproof cases and mounting options in more detail.
Pro Tip: Carry a small silica gel packet in your camera bag pocket, not just your card case. It absorbs the ambient humidity that builds up inside a sealed bag on a warm afternoon, well before you’d notice fogging on the lens.
Choosing Your Vantage: Onboard, Chase Boat, Shore, or Air
Where you shoot from changes the entire story your images tell, and it matters more than most beginners assume.
Shooting onboard gets you the closest access to genuine human moments: a hand on a winch, sun on a sailor’s face, the texture of rope under tension. Brace your body against a fixed point (a mast base, a cockpit rail) rather than trying to stand freely, and shoot low when you can. A low angle against the sky adds drama and, as a practical bonus, keeps the boat’s own wake out of a wide frame.
A chase boat gives you separation and compression that onboard shooting simply cannot. Onne van der Wal builds much of his regatta work around RHIB and chase-platform positioning, which lets a photographer control distance, angle, and background in a way that’s impossible from the deck of the subject boat. The tradeoff is coordination. You need a driver who understands wake management and won’t cut across the sailing vessel’s path, plus a clear plan for maintaining safe distance during maneuvers.
Shore or elevated shooting trades intimacy for scale and control. A long lens from a headland or dock gives you a clean, adjustable background and the ability to wait for the exact light you want without worrying about your own footing.
Aerial photography, whether from a drone or small aircraft, delivers a perspective no other vantage can match: full sail shape, wake patterns, and the boat’s relationship to the coastline all in one frame. It comes with real costs and constraints, though. Local drone regulations vary sharply by region, battery life limits your shooting window, and wind over open water is far less forgiving on a small aircraft than it looks in the footage.
- Onboard: closest access, best for crew portraits, requires bracing
- Chase boat: best separation and compression, needs driver coordination
- Shore or elevated: full control over background, works best with a telephoto
- Aerial: unmatched perspective, but weather- and regulation-dependent
Composition and Light: Getting the Frame Right
Golden hour, the hour or so after sunrise and before sunset, is the standard recommendation for sailing photography for good reason. The low, warm light adds depth and dimension that flat midday sun simply can’t produce, and it avoids the harsh reflections that bounce straight off open water at midday. That said, bright midday sun isn’t wasted light if you use it deliberately: strong overhead sun with a polarizer produces saturated, high-contrast images of turquoise water that golden hour can’t replicate, particularly around Halkidiki’s shallower coves where the seabed color shows through.
Horizon leveling is one of the simplest fixes with the biggest visual payoff. A level horizon reads as calm and intentional, while an unlevel one just looks like a mistake, not a stylistic choice. If you want dynamic tilt, commit to it clearly (a strong diagonal, not a barely-off-level frame) so it reads as a deliberate composition rather than a sloppy one.
Use rigging, sails, or a boat’s own lines as natural framing devices. Shooting through a gap in the sails or along a taut line toward the horizon adds depth that a flat, centered shot lacks. Foreground elements, a coiled rope, a cleat, a hand on the wheel, give the eye somewhere to land before it travels out to the water.
Adjust your polarizing filter dynamically while composing to optimize glare reduction and color saturation. The effect changes dramatically depending on your angle to the sun, and the sweet spot for cutting glare often isn’t where you’d guess. Roughly 90 degrees off the sun’s axis is where a circular polarizer does its strongest work, deepening blues and killing surface glare most effectively.
- Shoot golden hour for warmth, midday with a polarizer for saturated water color
- Maintain a level horizon for most shots unless intentionally composing with tilt.
- Use rigging and rope lines as natural frames
- Rotate the polarizer while watching the effect live, don’t set and forget
For scenes with a bright sky and dark hull in the same frame, a quick two-shot exposure bracket, one for the highlights and one for the shadows, gives you insurance you can blend later rather than trying to nail impossible dynamic range in a single click.
Reading the Moment: Action and Motion Techniques
- Watch the crew before you watch the sail. A tack or jibe starts with a crew member moving toward a line, several seconds before the boom actually swings, and that lead time is your window to get into position.
- Choose your shutter speed by intent. Freeze spray and rigging detail at 1/1000 or faster; drop to 1/125 with a deliberate pan if you want blurred water suggesting speed while the hull stays sharp.
- Fire in bursts, not single frames. Community-sourced advice from working sailing photographers consistently points to shooting a lot and using burst mode to raise your keeper rate, since the best expression or spray pattern often lands mid-sequence, not on your first press.
- Review sequences in blocks, not frame by frame, on your camera’s screen between shooting windows. It’s faster and helps you spot which part of the burst had the least camera shake.
- Time your shutter to the boat’s rhythm. Anticipating the lull between wave pulses gives you a brief window of relative stability that’s far more reliable than trying to out-brace a rolling deck.
A monopod can help steady a long lens, but treat it as a limited tool rather than a default. On a moving deck it can become a tripping hazard or get knocked loose, so use it only in calm conditions with a hand always on it, never propped and left.
Pro Tip: Lock your elbows against your ribs and exhale slowly right before you fire a burst, the same breath control divers use before a shot underwater. It shaves out a surprising amount of hand shake on a rolling deck.
Planning the Shoot: Working With Crew and Staying Safe
A five-minute briefing before departure prevents most on-water problems. Tell the skipper or crew what shots you’re after, whether that’s tight portraits, wide fleet coverage, or action during maneuvers, so they can factor your positioning into their plan rather than treating you as an afterthought. Establishing a simple hand signal for “ready to shoot” lets a sailor prepare for a moment without breaking concentration on a maneuver, a small habit that consistently produces better expressions and safer decks.

Position yourself where you have a clear shot without standing in a line’s path or blocking a crew member’s view forward. On a working sailboat, lines run under load constantly, and a photographer crouched in the wrong spot is a genuine hazard, not just an inconvenience.
If you’re photographing swimmers or snorkelers from the water, always confirm someone else is watching them directly. Never let the photographer become the only set of eyes on a person in open water.
- Brief the skipper on your shot list before leaving the dock
- Agree on a simple ready signal with anyone you’ll photograph closely
- Stay clear of running lines and winches at all times
- Assign a dedicated watcher if you’re shooting swimmers, don’t rely on the camera operator
- Have a backup plan ready if wind or swell picks up mid-shoot
Weather changes fast on open water, and a shot list built for flat, calm conditions won’t survive an afternoon breeze picking up over Sithonia’s coastline. Build flexibility into your plan rather than a rigid shot-by-shot schedule.
Workflow: Shooting RAW and Saving Your Best Frames
Shoot RAW every time you’re on the water. Sailing scenes routinely stack bright sky against dark hulls and deep shadow under sails, and RAW files give you the dynamic range to recover detail a JPEG simply throws away. When a scene’s contrast is extreme, a quick two-frame bracket (one exposed for the sky, one for the water and hull) gives you material to blend without fighting a single exposure to do everything.
Backup discipline matters more on a boat than almost anywhere else, because a dropped card or a corrupted file can’t be reshot once the light or the moment is gone. Pro workflows lean on redundancy: carry at least two cards and swap or copy files during any lull in shooting rather than waiting until you’re back on land.
- Shoot in RAW format to maximize editing flexibility
- Bracket exposures in high-contrast, sky-and-hull scenes
- Carry multiple memory cards and perform backups during shooting sessions
- Apply noise reduction selectively to shadow areas, not the whole frame
- Recover highlight detail in the sky before touching shadow recovery
In post-processing, correct water color first, then sky. Water often skews slightly green or overly blue depending on the camera’s white balance reading, and fixing that before touching the sky prevents you from overcorrecting one to compensate for the other. A modest boost to clarity or texture on sail fabric brings out the weave and creases that flat lighting tends to flatten, without pushing the whole image into an artificial-looking sharpness.
Beyond Golden Hour: Other Windows Worth Shooting
Golden hour gets the most attention, but it’s not the only window that produces strong sailing images. Overcast, even light is genuinely underrated: it eliminates harsh shadows on sails and faces, giving you consistent exposure across an entire burst sequence without blown highlights on white sail fabric.
Midday sun paired with a polarizer, as covered earlier, produces saturated turquoise water shots that soft evening light can’t match, especially over the shallower, lighter-bottomed coves around Kassandra and Paliouri. Blue hour, the twenty or so minutes after sunset when the sky holds deep blue but artificial or cabin lights start to glow, produces a striking contrast between a warm-lit boat and a cool sky, though it demands a faster ISO and a steady hand since ambient light drops quickly.
Wind conditions matter as much as sun position. Moderate, steady wind fills sails into clean, photogenic curves, while light or gusty conditions produce a slack, wrinkled sail shape that photographs poorly regardless of how good the light is. Watch the sail shape before you commit to a shooting window, not just the sky.
Haze and light cloud cover can work in your favor too, diffusing direct sun into something closer to a giant softbox, which is particularly useful for portrait-style shots of crew where you don’t want harsh facial shadows under a midday sun.
A Sunset Sail Aboard Off The Hook: What Actually Worked
Last season, photographing a sunset sail aboard Off The Hook off Neos Marmaras gave me a clean test of most of this advice at once. Wind was moderate, sails were full, and the light was dropping fast, so the plan was simple: 24 to 70mm on the body for guest and crew shots, 1/500 shutter, f/5.6, ISO 800 rising to 1600 as the sun dropped, continuous AF-C with back-button focus, and burst mode the entire final twenty minutes of light.
The best frames came from bracing low near the cockpit rail and shooting up toward guests silhouetted against the sky, timed to the boat’s gentle roll rather than fighting it. Guest comfort mattered as much as camera settings. Nobody wants a lens in their face during a relaxed sunset sail, so I stayed at the edges of the group and let moments happen rather than directing them.
Afterward, the routine was fast: damp cloth on the front element, dry cloth right behind it, gear straight into a dry bag before the ride back to the marina. If you’re planning a similar shoot, the sailing photography gear checklist covers the exact packing list worth building around.
Building Your Own Eye Behind the Lens
Most sailing photography advice treats gear and settings as the whole problem, and that’s where most guides undersell what actually separates a good frame from a forgettable one. Anyone can set a 1/1000 shutter and burst mode. What’s harder to teach, and what actually shows up in the strongest images, is reading a boat’s rhythm well enough to know which three seconds of a ten-minute tack are worth shooting at all.
The gear checklist matters, and I’ve spent most of this guide on it because it removes the excuses. But the photographers who consistently come back with keepers aren’t the ones with the newest telephoto. They’re the ones who watched enough sailing to know that the moment right before a jibe, when the crew shifts weight and the sail goes momentarily slack, tells a better story than the dramatic snap of wind filling canvas a half-second later. That’s not a settings problem. It’s a pattern-recognition problem, and it only comes from watching more sailing, not buying more gear.
If there’s one piece of contrarian advice worth taking from all this, it’s to spend your first outing shooting less and watching more. Put the camera down for ten minutes, watch how the crew moves, watch how the boat responds to wind shifts, and then pick it back up. You’ll come home with fewer frames and a noticeably higher percentage of ones worth keeping.
— George
Sources
The techniques covered here draw on working maritime photographers and hands-on sailing communities, including Onne van der Wal’s regatta photography guidance and practical advice from Nine Tips for Better Sailing Photography. For readers planning a Halkidiki shoot, the Sithonia route and cove guide pairs well with the gear checklist above.
Ready to put this into practice where the light and water actually cooperate? A sunset private cruise aboard Off The Hook gives you the exact golden-hour window this guide keeps pointing to, with a full sail, a professional crew, and no rush to pack up before the light disappears.
- Sailing & Seascapes in St. Thomas: Boat Photography Tips
- 8 Tips for Photographing Sailboat Regattas, with Maritime Photographer Onne van der Wal
- Getting The Best Results When Photographing From A Boat Or Ship
- Nine Tips for Better Sailing Photography
FAQ
What is the 20-60-20 rule in photography?
On a sailing shoot, that means balancing fleet-wide scenics with crew action and close-ups of hands, rigging, or expressions.
What are the five essential rules of sailing photography?
The core rules are: prioritize a fast shutter speed (1/500 or faster), shoot in continuous burst mode, use a polarizer to control glare and color, protect your gear from salt spray with a dry bag and microfiber cloths, and choose your vantage point (onboard, chase boat, shore, or aerial) based on the story you want to tell.
What are seven tips for taking good sailing photographs?
Shoot RAW, level your horizon, use golden hour or a polarizer-assisted midday, brace your body against a fixed point rather than standing freely, anticipate crew movement before a maneuver starts, back up your files with two memory cards, and review burst sequences fully rather than judging the first frame.
How do you take good boat photos from a moving vessel?
Brace against a fixed point on the boat, use a shutter speed of at least 1/500, shoot in continuous burst mode timed to the lull between wave pulses, and keep your camera secured with a wrist leash or cross-body strap rather than a loose neck strap.
Do I need a drone for good sailing photography?
No. A drone adds a unique aerial perspective, but onboard, chase-boat, and shore vantage points each produce strong, distinct images without one, and drones come with real regulatory and weather limitations that don’t apply to a camera in hand.